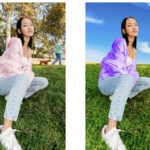
Photoshop is usually the last stage in the process of editing a photo. You’ve captured your pictures, and now you’ll have to get them into Adobe Photoshop, where they belong. Post-processing is an essential component of integrated photography. Even if you think you’ve captured the ideal shot, there’s always space for a bit of photo editing magic to enhance it. This is important especially if you have to delete objects from important images and for this tools like inpixio can come in handy.
In this article, we will discuss the five techniques in Adobe Photoshop. On how to adjust, improve and change the entire dynamic of a photo.
How to use Photoshop in Editing a Photo
Many graphic design tools available in the market, such as CorelDraw Graphic Suite and Adobe Illustrator, but most photographers started with Adobe Photoshop for basic retouching.
Photoshop is a complex but user-friendly tool that can help you bring out the most in your photos, so if you are a dedicated photographer, you should learn how to edit pictures using Photoshop. Take a look at these five steps that we will discuss below.
5 Steps and Tips on How to Edit Using Photoshop
1. Changing the Brightness and Contrast
Using a Brightness/Contrast Adjustment Layer is one of the simplest but most effective methods to enhance dynamics or enhance the overall definition. It can be used to brighten or darken a photo and reduce or improve the difference between brightness and darks.
Click the Create new fill or adjustment layer icon at the bottom of the Layers palette.
Choose Brightness/Contrast from the pop-out list.
In the Properties window that appears, you may change the settings for the adjustment layer. Move the sliders to your taste. The advantage of using adjustment layers instead of editing Brightness/Contrast via Image > Adjustments menu is that you can save the original image when you save it as a.psd or the other file type that keeps layers. This process is applicable in all adjustment layer modes.
As you can see, the editor reduced the brightness by -16 and increased the contrast to 65, giving in a richer photo.
Tip: When you create an adjustment layer, Photoshop automatically creates a mask – the white box beside the icon – to the layer. You can change an area by selecting it, adding the Adjustment Layer, and then changing the settings to affect just that pre-selected area. You may also use the black paintbrush to mask off areas, enabling the adjustment layer to adjust the affected areas.
2. Adjusting Curves for a Nostalgic Look
Curves in a photo can adjust to change the overall tone or precisely change each color channel’s values.
In this photo, the editor uses Curves to shift the individual RGB channels, giving in a washed-out, old photo appearance while also increasing the contrast. It will bring the picture into a calmer tone.
Tip:During the adjustment process, the photo will start to appear strange. Don’t judge the outcome until you’ve completed these stages. If necessary, you can return to each channel and make another adjustment.
To do Adjusting Curves, here are the steps:
Refer to the Properties window after selecting Curves from the adjustment layers menu. Locate the RGB drop-down menu at the top of the Properties window. Then, select the Red channel by clicking on it.
Move the dark slider in the lower-left corner of the graph to the right. It reduced the level of red in the image’s dark areas.
Another Tip:If you’re dealing with a CMYK photo, replace the RGB (red, green, blue) channels with CMYK (cyan, magenta, yellow, k = Black).
3. Now, create a gentle S-curve in the Green and Blue channels. Choose Green from the Channel drop-down list.
4. Click and drag down slightly on the green diagonal line to the left of the middle of the graph. Lastly, click again to the right of the middle and pull up slightly.
5. Select the drop-down menu again, then repeat this for the Blue channel. With this, you get an old picture with a more romantic or nostalgic tone.
3. Using Vignette to Create Focus
By applying a vignette to a photo, you can separate it from its environment and draw more attention to this matter. You can also use a vignette in combination with the Curves adjustments mentioned above to enhance the nostalgic effect.
To do use Vignette, here are the steps:
Go to Edit in the main menu and choose Fill. Choose Black in the Contents drop-down.
Then, at the bottom of the Layers window, click the Add layer mask button to create a layer mask. White must be used to fill it. If it isn’t, select the layer mask by clicking on it and repeat the Fill steps from above, but this time chooses White.
To use the Brush tool, press B on your keyboard or choose it from the Tools menu. To open the brush choices window, right-click.
Adjust the Size slider to create the brush as large as the picture, or slightly larger or smaller. Slide the Hardness slider down. It will provide the gentle, gradual edges required to draw a vignette into the mask.
Make Black the foreground colour of the brush with the layer mask chosen. Click on the center of the picture to see the original underneath. You may have to click a few times to change the coverage. If you make a mistake, refill it with Black.
Then, reduce the layer’s Opacity in the Layers window. Here are the settings used for the layer mask, as well as the results.
4. Add Blend Mode Layers
Blend Modes to stack layers of solid colours may completely transform an underexposed photo, dull, or lack of dynamics. We’ll apply a saturation layer in this step, enhancing the warmth and highlights in a few steps.
First, we’ll add saturation:
To create a new layer, press Command + Shift + N, then fill it with Black.
Colour Burn should select as the blend mode.
Reduce the Fill percentage to 15%.
Add some colour back in the highlights:
Add a new layer, fill it with blue.
Set the blend mode to Colour Dodge.
Set the Fill to 10%.
5. Dehaze with Camera Raw Filter
This final one is a little under-the-radar. We’ll use a feature in the Raw Camera Filter used when importing RAW pictures from a camera into Photoshop for editing.
It will provide the photo a layer of selective saturation. The program detects low-contrast clouds blending into a dreary winter sky and makes them stand out. It’s amazing. The sky becomes bluer, the clouds have depth, and use it for pictures that aren’t cloudy.
To use it:
Go to Filter> Camera Raw Filter in the main menu or press Command + Shift + A on the keyboard. It takes you to a new tab. A Dehaze slider control can found in the bottom-right corner, and we’ll bump it up to +42 for this photo. With this, it improves contrast and saturation without overdoing it.
Use this setting with care if you want to improve a hazy, ghostly photo-realistically. On the other hand, some very cool artificial effects can achieve. It all depends on how you want to use images.
Other helpful tips for photo editing:
Always shoot (and Edit) in RAW.
To ensure accurate color, calibrate your computer display.
Always make changes to a duplicate layer (keeping the Background layer untouched) so that you can compare the newly modified layer to the original.
Adjust in small increments as needed, and repeat if required.
Final Tip: Be mindful that you should be using this Filter on a JPEG. You can use it with other file formats, but the Filter will only show the current layer you are adjusting if the image is layered.
Author
Jennysis Lajom is an IT graduate, a chemist, an eCommerce business owner, and a Korean drama fan. Her passion for digital marketing led her to a career in graphic design, editing, and social media marketing. She is also one of the resident SEO writers in Softvire USand Softvire Australia.
Related Reading
More contextual TechBooky stories selected from tags, categories and article context.
We use cookies to ensure that we give you the best experience on our website. If you continue to use this site we will assume that you are happy with it.